
Mastering low-light photography can be a challenge, but with the right techniques and tools, you can create stunning images in dim environments. This guide will help you understand the art and science of low-light shooting, offering practical tips and expert advice to elevate your photography.
Low-Light Photography
Advancements in camera technology have made low-light photography more accessible, allowing photographers to capture stunning images in dim environments that were once difficult. Early photography struggled with low light due to limitations in film and sensors, but digital cameras with improved sensors, higher ISO capabilities, and faster lenses now make it possible to shoot in low light without sacrificing quality. This shift has expanded creative possibilities for capturing night scenes, indoor events, and more, while also enhancing video production. Today, low-light photography plays a key role in visual storytelling, enabling experimentation with mood and lighting.

Tips for Shooting in Low Light Conditions
Understand Your Camera Settings
Mastering your camera’s settings is the foundation of low-light photography. Adjust the ISO to make your camera sensor more sensitive to light, but balance it carefully to avoid excess noise. Use a slower shutter speed to allow more light to hit the sensor, and pair it with a wide aperture (lower f-stop) to let in as much light as possible.
Learning to balance these elements is key to achieving well-exposed shots in dim conditions. Practice experimenting with different combinations based on your shooting environment, whether it’s an indoor event, a cityscape, or nighttime nature photography.
Use a Tripod
A tripod is indispensable for low-light shooting. It provides the stability needed to capture sharp images when using slower shutter speeds. Without it, even the slightest hand movement can result in blurriness, especially in long exposure shots.
For added convenience, look for lightweight, portable tripods that you can carry easily. Consider using a remote shutter release or your camera’s timer function to avoid disturbing the setup when capturing your shot.
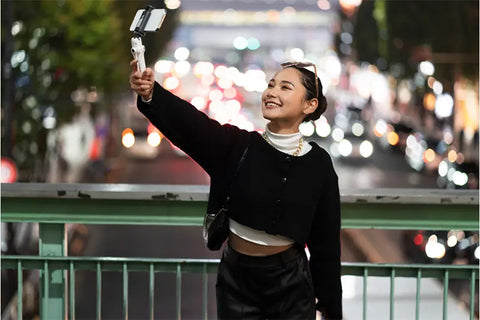
Take Advantage of Available Light
Maximizing available light sources can significantly improve your photos. Position your subject near streetlights, candles, or other ambient light to highlight key details. Observing how light interacts with shadows can help create dramatic and artistic compositions.
Experiment with different angles to make the most of these light sources. Even minimal light can transform your photos if used creatively. Reflective surfaces like windows or mirrors can also bounce light to illuminate your subject effectively.
Employ External Lighting
When ambient light isn’t sufficient, the BIGSOFTI ONE is the best choice for portable lighting. This soft light provides professional-quality illumination, allowing you to control the intensity and direction of light for the perfect setup. While LED panels and flashes are good alternatives, the BIGSOFTI offers unmatched convenience and consistency for creating a polished, well-lit environment.
Use external lights to fill in shadows or highlight your subject without overpowering the natural ambiance. Experiment with diffusers or light modifiers to achieve soft, even lighting that enhances your composition.

Experiment with White Balance
White balance settings ensure your photos accurately reflect the colors of the scene. Adjusting it can help counter the yellow or blue tint often produced by artificial light sources.
Try different presets such as Tungsten or Fluorescent to match the lighting conditions, or manually set the white balance for more control. A well-balanced image looks natural and maintains the mood of the scene.
Use a Fast Lens
A fast lens with a wide aperture (like f/1.4 or f/2.8) is a game-changer for low-light photography. These lenses allow more light into the camera, making it easier to shoot sharp images without relying on high ISO levels.
Fast lenses are also ideal for creating a shallow depth of field, which isolates your subject and adds a professional touch to your photos. Invest in prime lenses for their superior optical performance in low light.
Rely on Manual Focus
Autofocus systems can struggle in low light, often resulting in missed focus points or slower performance. Switching to manual focus gives you full control and ensures your subject is tack-sharp.
Use your camera’s focus assist features, such as focus peaking or magnification, to help achieve accuracy. Practice focusing manually to build confidence and speed for capturing fleeting moments.
Reduce Noise in Post-Processing
Noise is a common challenge in low-light photography, but post-processing tools can help mitigate it. Use software like Adobe Lightroom or Photoshop to reduce grain while maintaining details.
Adjust noise reduction settings carefully to avoid losing sharpness. Shooting in RAW format gives you more flexibility in editing and ensures your final image retains quality.
Experiment with White Balance
White balance settings ensure your photos accurately reflect the colors of the scene. Adjusting it can help counter the yellow or blue tint often produced by artificial light sources.
Try different presets such as Tungsten or Fluorescent to match the lighting conditions, or manually set the white balance for more control. A well-balanced image looks natural and maintains the mood of the scene.
Shoot in RAW Format
Shooting in RAW is essential for low-light photography. Unlike JPEGs, RAW files preserve all the image data, allowing for better adjustments in exposure, color correction, and noise reduction.
While RAW files require more storage space and post-processing time, the benefits far outweigh these minor inconveniences. They provide the flexibility to recover details from shadows or highlights, making your images truly stand out.
Practice Long Exposures
Long exposures are perfect for capturing creative shots like light trails, starry skies, or glowing cityscapes. A slower shutter speed collects more light over time, revealing details invisible to the naked eye.
Combine this technique with a sturdy tripod and remote shutter to avoid camera shake. Experiment with exposure times and watch how light transforms your scene into a masterpiece.
Conclusion
Mastering low-light photography requires understanding camera settings, using the right tools, and employing creative techniques. Begin by adjusting the ISO for light sensitivity, using a wide aperture to let in more light, and setting a slower shutter speed to balance exposure. Stability is crucial, so a tripod is indispensable for sharp, long-exposure shots. Maximize available light sources like streetlights or candles to create dramatic compositions, and enhance your setup with portable lighting such as the BIGSOFTI soft light, which offers professional-quality illumination for controlled and polished results. A fast lens with a wide aperture, such as f/1.4 or f/2.8, is ideal for capturing sharp images and creating a shallow depth of field.
Experimentation is key to achieving stunning low-light shots. Adjust white balance to maintain natural colors under artificial light, and use manual focus to ensure accuracy when autofocus struggles in dim conditions. Shooting in RAW format preserves image details, allowing for better noise reduction and exposure adjustments during post-processing. Long exposures are excellent for capturing creative scenes like light trails or starry skies, with a sturdy tripod and remote shutter release ensuring stability. With practice and these techniques, photographers can elevate their low-light images to professional levels.
Summary:
- Understand Your Camera Settings: Adjust ISO, shutter speed, and aperture to achieve proper exposure in low-light environments.
- Use a Tripod: Stabilize your camera for sharp images, especially when using slower shutter speeds.
- Maximize Available Light: Utilize ambient light sources like streetlights or candles to enhance your composition.
- Employ External Lighting: Tools like the BIGSOFTI ONE provide portable, professional-quality illumination for controlled lighting.
- Experiment with White Balance: Adjust settings to match the light source and maintain natural colors.
- Use a Fast Lens: A wide aperture lens (e.g., f/1.4) allows more light in and creates a shallow depth of field.
- Rely on Manual Focus: Achieve precision in low light by manually focusing, especially when autofocus struggles.
- Reduce Noise in Post-Processing: Use software like Lightroom to fine-tune noise reduction while preserving details.
- Shoot in RAW Format: Preserve maximum image data for better post-processing flexibility and quality.
- Practice Long Exposures: Experiment with slow shutter speeds for creative effects like light trails and starry skies.
FAQs
-
What is the best lens for low-light photography?
A fast lens with a wide aperture (f/1.4 or f/2.8) is ideal, as it allows more light to reach the sensor, making it easier to shoot in low-light conditions. -
How can I reduce noise in my low-light photos?
You can reduce noise by shooting in RAW format and using post-processing software like Adobe Lightroom or Photoshop to apply noise reduction techniques. -
How can I improve lighting in very dark environments?
Portable lighting tools, such as the BIGSOFTI soft light, are excellent for low-light setups. These lights provide controlled, even illumination while maintaining the natural ambiance of your scene. -
What’s the ideal ISO setting for low-light photography?
The ideal ISO setting depends on your camera, but typically, keeping ISO as low as possible (around 800-1600) while maintaining exposure balance will reduce noise. -
How do I capture light trails or starry skies in low light?
Long exposures are perfect for capturing light trails or starry skies. Use a tripod and a remote shutter release to avoid shake and experiment with slower shutter speeds.